Part 2 – Rebuilding
In last week’s post, I described the sorrow I felt at having to take down a tree that I loved because of the potential damage it would cause to our house in future years.[1] Because we removed the tree, we were able to properly fix the retaining wall it had compromised, rather than just trying to rebuild the wall around it (which would only be a temporary fix as the tree continued to grow). This was not Christian’s first time rebuilding a retaining wall, but it was mine, and I was interested to learn about the process through its different stages.

Back to Basics
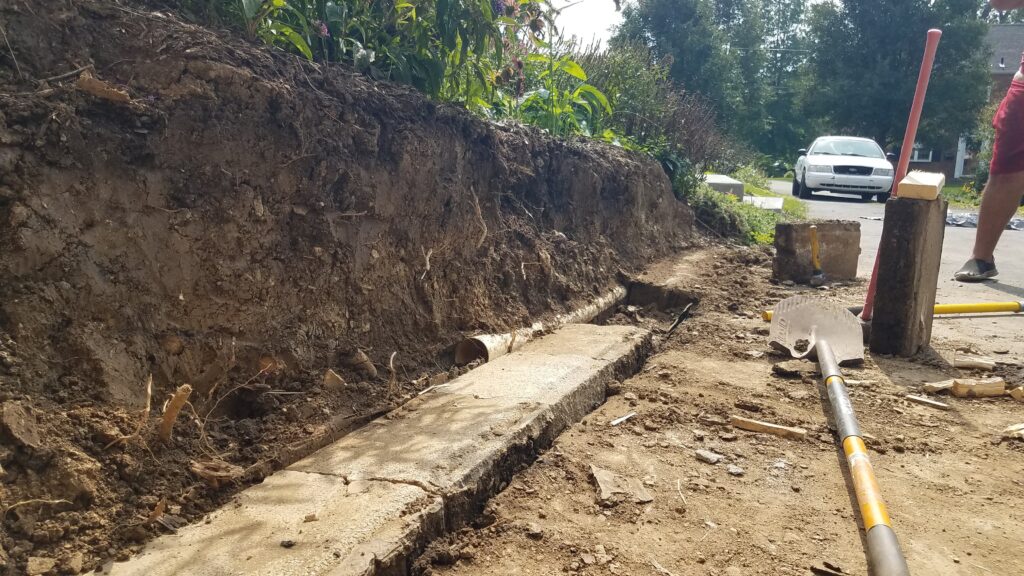
Once we had removed “my” tree from the side of the house, Christian was able to dig back and take a better look at the damage. The base row of the retaining wall was actually tilted out, away from the hillside, which was the first problem. Retaining walls are supposed to tilt slightly into the hillside, and that isn’t going to happen if the base row isn’t in the correct position. There were roots behind the wall, so it was clear that the tree had played a role in the wall’s demise, but we could also see that either the wall hadn’t been built correctly in the first place, and attempts to fix it over the years didn’t actually address the problem.
As it happens, it appears that the wall had been rebuilt a couple times over the years, but as we’ve seen with numerous DIY projects from the previous owner, an uninformed, half-assed attempt was the best he had, whether it came to carpentry, masonry, or insulation. It looked as though the base row of stones had never been pulled up to correct the tilt, but there were some curious additions above that base row, such as planks of wood and drizzled cement. Were these added to try to change the angle of the wall at the second row? Who’s to say?
Ultimately, Christian dug out the base row, which started below the height of the driveway, and added dirt where it was needed to level the blocks. If we wanted to “dot every i,” we really should have dug just a little deeper and created space to regrade the whole length of the wall with gravel, but at least the foundation is in much better shape than it was. What that hopefully means is we won’t have to rebuild that wall again while we’re still alive. (We have others that will be coming due in the next few years, so this knowledge will not be wasted.)
Rebuilding the Wall
There are some good resources online for tips if you’re building (or rebuilding) your own retaining wall.[2] Generally, if the wall is going to be higher than four feet tall, experts recommend you work with an engineer, just because there is so much soil to be held back and there may be significant impacts to water flow in your yard. An alternative to one big wall is multiple small walls, as long as they are spaced far enough apart: the distance between walls should be twice the height of the walls.
The basics of the rebuilding process involved moving all of the blocks to the other side of the driveway, and then cutting back the soil into the hillside. Since I hadn’t (yet) planted up to the wall, very little of my garden was impacted by the process. Christian re-laid the base row of block and replaced a shattered piece of PVC pipe that diverts rain from our gutters into the driveway via the back of the wall. Multiple old pipes (there had been at least one replacement at some point) were not fitted together well, but were also thin and flimsy. Whether from the weight of the soil or the roots of my tree, what remained in the ground was useless, and the downspout was pumping water directly into the back of the wall.

Water is the biggest reason for retaining wall failure, which is why for taller walls and solid walls (made of concrete instead of separate blocks), a drainage system behind the wall is necessary. Water also increases the weight and volume of soil being held back, which is why you shouldn’t have the soil right up against the wall itself. The proper method is to cut back the hillside, build the wall so there is a gap, and fill that gap with gravel. That gives the soil some room to expand and contract, and it improves drainage. There was (unsurprisingly) no gravel behind our wall when it came down.
Replanting the Garden
While there is no way I could replace my tree (and I was honestly surprised when several friends on Facebook suggested it), there is a hole in the landscape. I’m sure the roses put in by the previous owner, as well as the phlox put in by me will have more of a chance to flourish with the increased sun and space, but I still think the corner of the house looks odd without something to frame the porch, and the garden looks like it just falls off the side of the hill without something large as an anchor.
I started off thinking that a large shrub would do the trick, but reading about what to plant on top of a retaining wall has left me feeling frustrated because I have yet to identify a native shrub that fits the bill. Factors to consider when planting include: [3],[4]
- Root structure (which is obviously the issue that caused this problem in the first place) – you want to look for something that has a shallow root system and won’t damage the wall; many native shrubs that I would like to plant have substantial, woody roots
- Moisture preferences – since the wall is supposed to have good drainage, you’ll need a plant that is a little more drought tolerant
- pH preferences – since you’ve hopefully just dumped a bunch of limestone behind those blocks, the surrounding soil will become more alkaline, and some plants prefer more acidic environments; you’ll either need to pick something comfortable in the lower pH range or commit to using an acidic soil additive
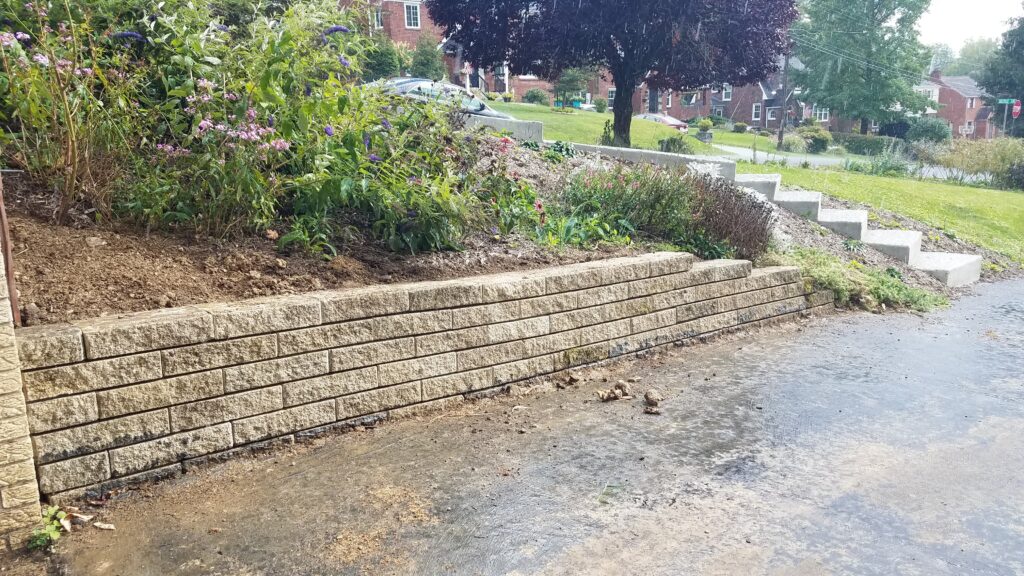
Of the recommended plants that hit these criteria, nothing was tall. Tall plants with shallow root systems wanted more water or low pH soil. Finally I realized that I had another option available to me: not a shrub, but a vine. One specifically recommended for retaining wall planting was Virginia Creeper,[5] which we have all over the back of our house. It gets a little unwieldy if you don’t cut it back (and I haven’t), so it was not my first choice. Other native vines I had in mind were too aggressive (trumpet creeper [6]) or liked acidic soil (coral honeysuckle [7]), though sources are conflicting on the coral honeysuckle’s pH preferences – I would like to plant that one if I can. Fortunately, I have until spring to make a decision… and I am always open to suggestions!
Have you landscaped around a retaining wall? What plants have worked well for you? I’d love to hear about it below.
Thanks for reading!
[1] https://radicalmoderate.online/shaka-when-the-walls-fell-part-1/
[2] https://www.bobvila.com/articles/building-retaining-walls/
[3] https://wraxly.com/best-plants-for-retaining-walls/
[4] https://homeguides.sfgate.com/should-not-plant-close-retaining-wall-94300.html
[5] https://www.wildflower.org/plants/result.php?id_plant=paqu2
[6] https://www.wildflower.org/plants/result.php?id_plant=CARA2
[7] https://www.wildflower.org/plants/result.php?id_plant=LOSE
0 Comments