Winter has arrived in Pittsburgh, in temperature if not officially. We have a family of kitties in our neighborhood that were just kittens last year, but are now adults. I intend to start a Trap Neuter Release program before we get any more kittens showing up, but first things first: I want to get them a safe place to stay during the cold months.
The idea behind these shelters is that they will 1) help to shield the kitty/kitties from cold winds and weather, and 2) be insulated enough that the kitty’s/kitties’ body heat will warm the inside of the shelter slightly. Ultimately, bigger is not necessarily better for these shelters. You want it to be big enough to safely shelter 2-3 stray cats, but small enough that they can stay warm without struggling to heat a large space themselves.
I did some research about best designs for feral cat shelters, and my hope was to find some materials at a second-hand store so I wouldn’t be buying new plastic products (specifically tubs and Styrofoam). Unfortunately, that was not an option, so I wound up buying new materials. If you are planning to make shelters like these, I would recommend checking around for pre-owned coolers, plastic tubs, and even Styrofoam boxes.

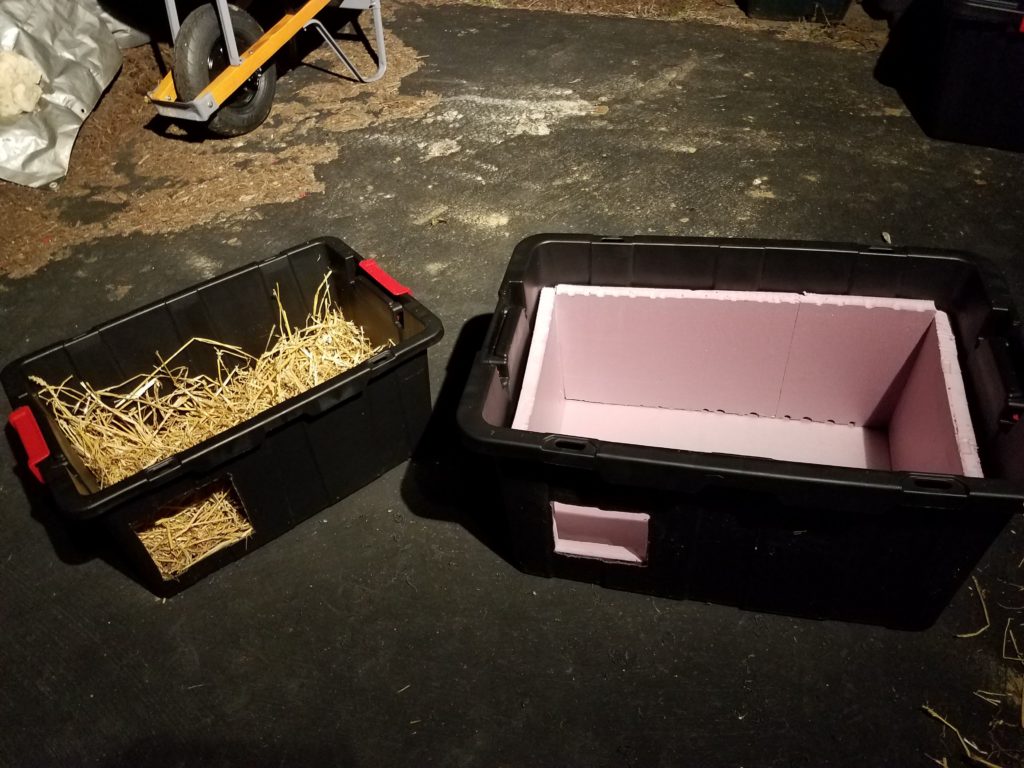
There are several different methods, the two primary ones being using an existing drink/food cooler[1] and making an insulated shelter from plastic bins.[2] We had a quick and severe cold snap a few weeks ago before I had a chance to buy any materials. Christian was worried about one stray in particular – a tabby who has been sleeping in the bushes under our bedroom window. Christian took an old drink cooler that we haven’t used in years, cut a 6-inch hole in the end, and put it near where the tabby sleeps. The drink cooler approach is a good one because coolers are nicely insulated to start with. Simply make sure the hole is off the ground a few inches, and put some straw on the bottom for some added insulation between the kitty and the inside of the cooler, which will still be cold sitting out in the snow.
Fortunately the cold snap didn’t last long, and I was afforded some time to make two larger shelters from scratch before the overnight temperatures dropped again. The model I made involved two layers of plastic bins with insulation in between.[3] I am pleased to announce that this model is officially kitty-approved. As of the writing of this post, we have at least one kitty making use of one of the shelters. I hope he brings his friends.
Materials
Size of bins: I used a 15 gallon bin (26″ x 17″ x 12″) and a 27 gallon bin (30″ x 21″ x 15″). These are the heavy-duty kind that is a little thicker than some of the other options. I selected black so it would hopefully soak up a bit of extra heat in the sun on cold days. If you’re using a food/drink cooler instead of two layers of plastic bins like I did here, just make sure the inside has enough space for 2-3 kitties.
And don’t forget to drill drainage holes in both bins on the end with the door.
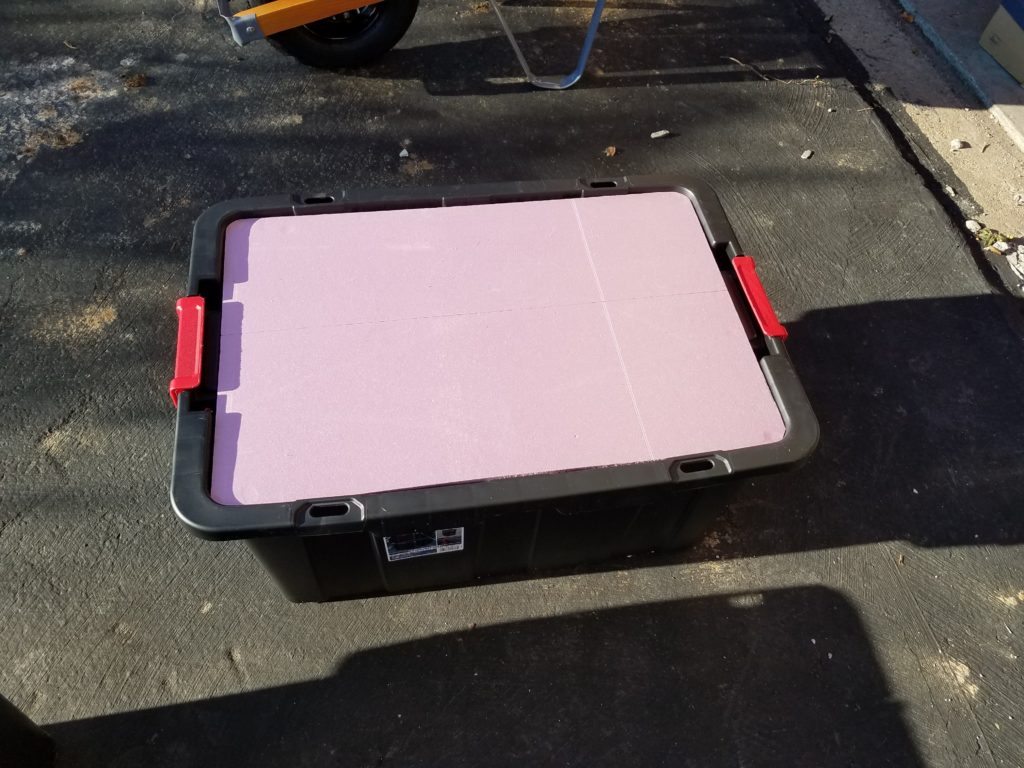
Type of insulation: I used 1-inch thick R5 insulated foam board. Don’t ask how I got a 4×8′ board home in a Miata (Christian was out of town with my Camry that weekend). It was nice to have a uniform piece of foam, rather than trying to deal with different shapes, sizes, and thicknesses of reclaimed Styrofoam. In fact, I could not find Styrofoam at any of the grocery stores I frequent. Apparently their meat and produce don’t come in Styrofoam anymore – which ultimately is a good thing, even if it meant that I had to buy, rather than repurpose foam for these shelters.
What to put inside: I used straw, which is your best option because it is hollow and creates an air cushion between the kitty and the plastic, which can get very cold in the winter. I bought a half bale of straw at a local garden center, which was significantly more than necessary, but I will probably insulate underneath each of the bins as well. You should not use hay (which can hold onto moisture and get moldy), blankets (which can actually absorb body heat from the kitty instead of reflecting it), or heated blankets (which can cause a safety risk in confined and/or wet conditions) inside the shelter. You might try mylar blankets (like what you see runners using after marathons), which are good at reflecting heat, but one site said feral kitties might be scared by the crinkling noise it makes and stay away.
Construction Process
Measure twice; cut once. There was a lot of assembling, disassembling, and reassembling to make sure that everything fit together correctly, but if you pay attention to detail, you will wind up with a solid product at the end.
I started out by cutting a piece of insulation that fit in the bottom of the larger (outside) bin. Then I cut pieces that would fit on the back and sides in the space between the larger and smaller bin. I placed the smaller bin inside to ensure a secure fit and cut out a piece of insulation that would fit on top of the small bin, underneath the lid of the large bin.
Disassembling everything, I marked where on the small bin I would be cutting the doorway, making sure it would be close to the side (not in the middle) and at least a few inches off the ground. I drilled two drainage holes in each bin: one in each corner on the side of the bins with the doorway. I cut a 6×6 inch square near the corner of the small bin and put the small bin back in place inside the large bin with the insulation in place, marking where I should cut the hole in the large bin so both holes lined up.
Disassembling everything again, I cut the hole in the large bin and replaced the insulation on the bottom, back, and ends. I then measured what size pieces of insulation I would need to fill in the space around the doorway. I placed the pieces of insulation around the doorway in the front, and put the small bin inside. I lined the small bin with straw, put the lid on the small bin, put the fitted piece of insulation on top of the small bin, and put the lid to the large bin on top of that. Easy-peasy. Repeat as needed for the number of kitties in your neighborhood.
At least one site advised raising the shelter slightly off the ground and stuffing the space between the ground and the shelter with straw to help insulate it better. The side with the doorway and the drainage holes should be downhill. If you make two, the doorways should face each other to protect from the elements – ideally, you should place a piece of plywood on top to create a dry entryway. The tops should always be weighted down with bricks or stones, to help keep the shelter from moving around in strong winds.

As I said before, there seems to be some interest in the shelters. Christian and I have both seen at least one kitty (the black and white one, not the tabby) emerging on multiple occasions. Now that they’re spending more time near our house, I hope to get a few trapped and taken to the vet to get neutered before long. Female kitties in colder climates start to prepare for breeding as soon as the days start getting longer[4], which is coming right up, but that is a subject for another post.
Have you built any kitty shelters or done a Trap, Neuter, Release program? I’d love to hear about your experiences below.
Thanks for reading!
[1] https://myfox8.com/2019/11/13/utah-man-creates-cat-coolers-to-help-feral-cats-escape-winter-cold/
[2] https://feralcatfocus.org/colony-management-shelters/
[3] https://alleycatadvocates.org/communitycat-care-center/creating-winter-shelters/
[4] https://veterinarypartner.vin.com/default.aspx?pid=19239&catId=102902&id=6656707
2 Comments
John Rozborski · December 16, 2019 at 10:49 am
very interesting and timely. I was just talking with my friend Thursday about getting some feral cats for our property. His wife works with a group in Butler that catches and neuters feral cats. They will be setting us up with a couple. I will need to create some shelters just like these. question re: the drainage holes. is that for random rain and snow that gets in or are the cats urinating in the shelters? Are the drainage holes through just the bins, or did you create holes through the insulation and the bin? diameter?
Alison · December 16, 2019 at 10:57 am
Hi John,
The drainage holes are for any kind of moisture that might accumulate in there including rain/snow coming through the door or feline fluids. I drilled 1/2″ holes in each corner on the downhill side. I did not drill through the insulation, but you could. I figured that while the foam board is pieced together closely, it’s not water-tight, so drilling holes in the insulation was probably unnecessary.
I plan to open them back up in the spring and see if adjustments are needed.
Let me know how yours go!